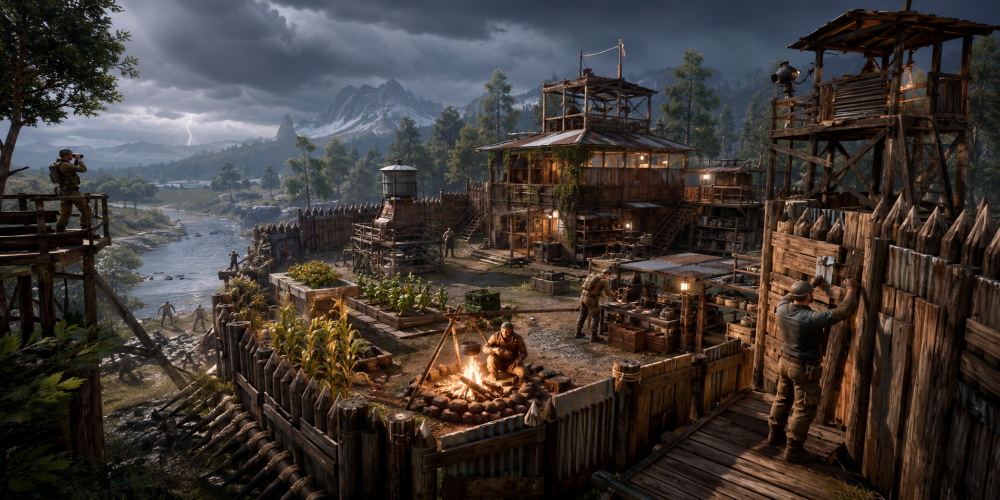
A good base is more than a collection of walls surrounding several storage containers. It is the center of your survival plan, the place where scattered resources become useful equipment, food becomes a dependable system, and dangerous expeditions begin with something resembling preparation.
A poorly planned base creates new problems instead of solving old ones. Crafting stations end up in unrelated corners, essential materials disappear into random boxes, entrances remain exposed, and every expansion requires rebuilding half the structure. It may look impressive from a distance, but so does a decorative cake until someone tries to use it as emergency shelter.
The exact construction mechanics differ between Minecraft, Valheim, Grounded, Sons of the Forest, ARK, Rust, Subnautica, Project Zomboid, and other survival games. However, the same principles appear repeatedly: choose the right location, secure essential resources, organize important systems, prepare for threats, and leave enough space for future growth.
This guide explains how to build a successful base that remains practical throughout the early, middle, and later stages of a survival game.
Understand What Your Base Needs to Accomplish
Before placing foundations, decide what the structure must provide. A first-night shelter has different requirements from a permanent settlement designed to support advanced crafting and large resource reserves.
Most successful bases perform several essential functions:
- Protect the player from environmental hazards and hostile creatures;
- Provide a safe location for sleeping or saving progress;
- Store resources in an organized way;
- Support crafting, cooking, farming, and equipment repair;
- Create a reliable point for starting and ending expeditions;
- Allow future expansion without complete reconstruction;
Your first base does not need to perform every function perfectly. It needs to solve immediate problems while providing a foundation for later development.
Do Not Confuse Your First Shelter With Your Final Base
One of the most common survival game mistakes is spending too much time perfecting the first structure. Early shelters are usually built with weak materials, limited tools, and incomplete knowledge of the map.
Create a compact temporary shelter first. Include a bed or save point, several containers, a basic crafting station, food preparation, and enough protection to survive the immediate environment.
Use this location while exploring nearby regions. Once you understand where important resources, dangerous areas, transportation routes, and progression objectives are located, you can choose a better position for a permanent base.
A temporary shelter is not wasted effort. It can later become a supply station, emergency refuge, farming outpost, or landmark between major locations.
Choose a Location Near Essential Resources
Location influences almost every part of base management. Building beside useful resources reduces travel time, lowers risk, and makes construction easier.
During the early game, prioritize access to basic materials such as wood, stone, food, and water. More advanced resources may become important later, but ordinary materials are required in much larger quantities during initial construction.
A strong location usually provides access to several resource types rather than only one valuable material. Building directly beside a rare mineral may seem efficient until every meal requires a long journey in the opposite direction.
Resources Worth Considering
- Renewable food sources;
- Clean or easily processed water;
- Wood, stone, fiber, or equivalent building materials;
- Advanced minerals and crafting components;
- Fuel sources;
- Plants used for medicine or equipment;
- Animals or creatures that provide useful materials;
Consider how quickly resources regenerate. A forest may look abundant during the first day but become empty after a large construction project. Renewable production should eventually replace complete dependence on nearby natural materials.
Build Near Transportation Routes
A permanent base should connect easily to the wider map. Rivers, coastlines, roads, caves, portals, railways, and open terrain can all improve transportation depending on the game.
Water access is particularly valuable when boats provide efficient movement. A coastal base may connect distant biomes more easily than a settlement surrounded by mountains.
In games with vehicles, ensure that the base has enough open space for parking, turning, loading, and repairs. A narrow entrance that works on foot may become extremely inconvenient after unlocking a large vehicle.
Fast-travel systems also affect location value. A remote but resource-rich area becomes more practical when connected to portals or other transportation networks.
Avoid Locations With Constant Environmental Pressure
A beautiful location is not automatically a practical one. Extreme temperatures, storms, flooding, darkness, radiation, poisonous air, and other hazards can increase maintenance costs.
Some environmental pressure may be manageable after unlocking advanced equipment, but it can make early development unnecessarily difficult.
Observe the area before committing to permanent construction. Spend at least one full day and night nearby when possible. Check weather changes, creature activity, visibility, and access to shelter.
An area that appears peaceful during daylight may become a regular gathering place for everything you hoped would remain elsewhere.
Study Enemy Routes Before Building
Hostile creatures and other players often follow predictable routes. Before establishing a permanent base, observe where threats appear and how they move through the environment.
Avoid placing the main entrance directly toward the most common approach. Use terrain to guide threats toward stronger defensive positions.
Natural barriers can reduce the amount of construction required. Cliffs, rivers, deep water, rocks, and narrow passages may protect one or more sides of the settlement.
However, do not rely completely on terrain without testing it. Some creatures climb, swim, jump, damage natural objects, or appear inside areas that looked inaccessible.
Start With a Small and Functional Layout
Large empty structures consume resources and create unnecessary travel inside the base. Begin with a compact layout containing only the systems you currently use.
Place frequently accessed stations near one another. Storage should sit close to crafting areas, food supplies should remain near cooking equipment, and defensive tools should be easy to reach from entrances.
A practical early layout may include:
- A central crafting area;
- A storage wall or storage room;
- A sleeping or recovery space;
- A cooking section;
- One controlled entrance;
- Space reserved for future expansion;
Compact does not need to mean cramped. Leave walking space around stations and enough room to open containers without blocking other objects.
Create Zones for Different Activities
As the base grows, divide it into functional zones. This prevents unrelated equipment from spreading across every available surface.
A crafting zone should contain production stations and the materials used by them. A food zone can include cooking equipment, water storage, farming supplies, and preserved meals.
Equipment repair, medicine, vehicles, animals, and power generation may require separate areas later. Zoning makes it easier to locate items and identify which part of the base requires improvement.
Useful Base Zones
- General crafting area;
- Metalworking or advanced production area;
- Food preparation and storage zone;
- Farming and animal management area;
- Equipment storage and repair station;
- Medical supply section;
- Vehicle or transportation area;
- Defensive command point;
- Sleeping and recovery room;
Not every game requires all of these zones. Build only what supports the available mechanics and your preferred playstyle.
Plan Storage Before It Becomes a Problem
Storage disorder develops gradually. One temporary box becomes three, those three become twelve, and soon half the session is spent searching for a component that was definitely placed somewhere sensible.
Create storage categories early. Separate raw building materials, food, equipment, medicine, crafting components, fuel, and rare items.
Use labels, signs, visual symbols, container colors, or item frames when the game supports them. Place containers in a consistent order so that new storage can follow the same structure.
A Simple Storage System
- Basic construction materials;
- Advanced resources;
- Food and farming supplies;
- Weapons and protective equipment;
- Tools and repair materials;
- Medical items;
- Fuel and power components;
- Rare or mission-related objects;
Keep frequently used materials closest to the crafting stations that require them. Long-term reserves can remain in a secondary room or protected lower level.
Leave Space for More Storage Than You Currently Need
Survival progression usually introduces new materials faster than players expect. A storage room that feels excessive during the early game may become completely full after several expeditions.
Reserve an empty wall, additional floor, or nearby room for future containers. This is easier than moving an entire crafting system when storage capacity runs out.
Do not keep every item simply because it might become useful. Learn which materials are renewable, common, outdated, or easy to replace. Organized storage works best when it is not filled with objects collected during the first hour and never used again.
Keep Emergency Supplies Near the Exit
Create a preparation station beside the main entrance. It should contain supplies required for common expeditions and emergency recovery.
Useful items may include food, water, medicine, ammunition, repair materials, light sources, spare tools, environmental protection, and transportation fuel.
When returning from an expedition, refill the station before storing less important materials. This ensures that the next journey can begin quickly.
A second emergency container can be placed near the sleeping or respawn point. It should hold basic equipment that allows you to recover after losing valuable items away from the base.
Build a Reliable Food System
Natural food gathering may support the early game, but permanent bases benefit from renewable production. Farming, fishing, animal management, traps, greenhouses, and preserved food can reduce dependence on uncertain exploration.
Start food production before supplies become critically low. Crops and animals often require time to become productive.
Grow several food types when the game uses nutrition, bonuses, or recipe combinations. One crop may provide basic calories, while another supports stronger meals or useful temporary effects.
Keep seeds and breeding resources separate from ordinary food. Accidentally consuming the final renewable source is an excellent way to convert dinner into a long-term agricultural crisis.
Secure a Renewable Water Supply
Water can determine whether a location remains practical. Build collectors, wells, purification systems, reservoirs, or pipes as soon as they become available.
Store enough water to survive interruptions caused by weather, damaged equipment, frozen systems, or failed power generation.
Place critical water equipment inside defensive coverage. A system located far outside the base may become difficult to access during an attack or environmental emergency.
When water must be processed, keep fuel or filtering materials nearby. Production stops when one small component is missing, regardless of how impressive the rest of the system looks.
Design Defenses in Layers
A single wall is rarely a complete defense. Effective bases use several layers that detect, slow, redirect, and finally stop threats.
The outer layer may include cleared terrain, lighting, warning systems, fences, traps, or natural barriers. The next layer consists of walls, gates, towers, and protected firing positions.
The inner structure should remain defensible even if the perimeter fails. Important storage, sleeping areas, and advanced equipment should not sit directly against the outer wall.
A Basic Layered Defense Plan
- Maintain visibility around the perimeter;
- Use barriers to control enemy movement;
- Strengthen entrances and weak corners;
- Create elevated or protected defensive positions;
- Keep an internal safe room or fallback area;
- Prepare a secondary exit for emergencies;
Layered defenses buy time. They do not need to stop every threat immediately if they provide enough warning for you to respond.
Limit the Number of Entrances
Every entrance creates a weak point. A large base with many doors may look convenient, but it becomes more difficult to defend and monitor.
Use one primary entrance for regular movement and one hidden or protected emergency exit. Additional gates should exist only when transportation routes or vehicles require them.
Create a controlled approach to the main entrance. Narrow paths, gates, barriers, and defensive positions make incoming threats easier to predict.
Do not block your own movement with excessive defenses. The entrance must remain easy to use during ordinary play and fast enough to escape through during an emergency.
Protect the Base From Above and Below
Players naturally focus on walls, but threats may approach from roofs, cliffs, tunnels, water, or underground areas.
Use covered roofs when flying creatures, weather, projectiles, or climbing enemies exist. Check whether nearby high ground allows threats to enter over the perimeter.
In games with digging or underground movement, foundations may require reinforcement. Basements and tunnels can create useful storage or escape routes, but they may also introduce hidden access points.
Walk around the completed perimeter and inspect it from several angles. Weak points are often obvious from outside but invisible when standing comfortably beside the crafting table.
Use Lighting as a Defensive Tool
Lighting improves navigation, reveals approaching threats, and may prevent hostile spawns in certain games.
Illuminate entrances, storage areas, crafting stations, farms, paths, and the outer perimeter. Avoid placing every light source inside decorative rooms while leaving the surrounding terrain completely dark.
Use consistent placement so missing or damaged lights are easy to notice. Backup torches or portable light sources should remain available if powered systems fail.
Excessive lighting may consume fuel or electricity, so prioritize functional areas before decorating distant corners.
Prepare for Base Raids and Large Attacks
Some survival games increase threat levels according to time, progression, noise, wealth, or completed objectives. A base that handles ordinary creatures may fail during a major raid.
Before advancing the story or unlocking a new region, inspect defenses and repair damaged structures. Refill ammunition, traps, food, medicine, and equipment.
Keep replacement building materials inside the protected area. Repairing the outer wall becomes difficult when every piece of wood is stored in a container on the other side of it.
Identify a fallback position before the attack begins. This could be an inner tower, underground room, elevated platform, vehicle, or secondary shelter.
Build an Emergency Exit
A base should not become a trap. If the main entrance is blocked, you need another way to leave.
An emergency exit can be a rear door, rooftop route, tunnel, boat dock, hidden ladder, zipline, or vehicle passage. It should lead away from the most likely direction of attack.
Keep the route simple and free from decorative objects. During an emergency, complicated doors and narrow corridors become far less charming.
Test the exit while carrying normal equipment. A route that works with an empty inventory may fail when movement speed is reduced.
Build for Structural Stability
Some survival games simulate support, weight, weather damage, ventilation, or material strength. Ignoring these systems can cause sections of the base to fail.
Use strong foundations, support beams, and appropriate materials for large structures. Upgrade the lower levels before adding heavy upper floors.
Pay attention to roof design. Rain, snow, and exposure may damage unprotected stations or reduce comfort bonuses.
Fireplaces and furnaces may require ventilation. A beautiful sealed room loses some of its appeal when the smoke system decides to become the primary opponent.
Upgrade Important Sections First
When stronger building materials become available, do not immediately rebuild every decorative wall. Prioritize areas where damage would cause the greatest problem.
Upgrade foundations, entrances, corners, defensive towers, storage rooms, and structures supporting expensive equipment.
Less important interior walls can remain basic until essential systems are protected. This creates a stronger base without consuming every advanced material at once.
Keep repair materials for both old and new construction types during the transition. A partially upgraded base may require several resources after an attack.
Separate Dangerous Production Systems
Furnaces, generators, chemical stations, fuel storage, and other advanced equipment may create heat, smoke, noise, pollution, or additional threat.
Place them in a separate workshop or utility building when possible. This protects sleeping and storage areas while making industrial expansion easier.
A detached workshop can also reduce damage if equipment fails or attracts attention. Connect it to the main base through a protected path rather than placing it far outside defensive coverage.
Store fuel safely and avoid placing every valuable resource beside the most hazardous machine available.
Plan Power Generation With Backup Capacity
Electricity often becomes central to advanced bases. It may support lighting, refrigeration, automated defenses, production stations, doors, water systems, and communications.
Calculate which systems are essential and which can be turned off temporarily. Refrigeration and defensive equipment may deserve priority over decorative lighting.
Use separate circuits or switches when the game allows it. This makes it easier to conserve fuel and isolate damaged systems.
Maintain backup generation through batteries, additional fuel, renewable sources, or a secondary generator. A base that depends completely on one machine is only one mechanical problem away from becoming a historical site.
Place Farms Inside or Near Defensive Coverage
Farms require space, light, water, and regular attention. Placing them too far from the main structure increases travel time and exposes them to threats.
Include farming areas inside the outer perimeter whenever possible. If they must remain outside, protect them with fences, lighting, and a direct route from the main entrance.
Separate crops according to purpose. Keep everyday food close to the cooking area, while rare plants used for medicine or advanced crafting can remain in a more protected greenhouse.
Store tools, seeds, fertilizer, and water beside the farm. This prevents repeated trips through the entire base for one missing item.
Manage Animals Without Creating Chaos
Tamed or domesticated creatures can provide transportation, materials, food, defense, or companionship. They also require space and can easily block doors, crafting stations, and vehicles.
Create dedicated pens, barns, platforms, or docking areas. Separate large animals from fragile structures and narrow pathways.
Keep feeding supplies nearby and protect breeding stock from attacks. Losing every animal at once can remove hours of progression.
Do not place the entire collection directly beside the sleeping area unless the game provides exceptionally peaceful creatures and an excellent sound system.
Create Safe Routes Around the Base
A successful settlement includes more than the central building. Paths connect farms, workshops, docks, defensive towers, mines, and transportation points.
Clear obstacles and mark routes with lights, signs, fences, or recognizable structures. Travel should remain simple during darkness, storms, or attacks.
Protect steep drops and dangerous machinery. A base should reduce accidental loss rather than create a carefully organized obstacle course.
Wide paths are useful for multiplayer groups and large vehicles. Leave enough room for players to pass without opening every storage container along the way.
Use Outposts Instead of One Enormous Base
A single central base cannot always support every region efficiently. Distant resources and progression areas may require smaller outposts.
An outpost should contain basic shelter, storage, food, water, repair tools, and transportation support. It does not need every advanced crafting station.
Place outposts near valuable resources, dangerous travel routes, major objectives, or biome boundaries. Connect them through roads, portals, boats, vehicles, or marked paths.
This network reduces the risk of losing progress during long expeditions and prevents the main base from becoming the only useful location on the map.
Make Multiplayer Bases Easy to Understand
Shared bases require clearer organization because several players use the same resources and stations. A system that feels obvious to one builder may look completely random to everyone else.
Label storage, assign zones, and agree on which resources should remain reserved. Keep communal equipment separate from personal collections.
Design corridors and crafting areas with enough space for several players. One narrow doorway can become surprisingly political when four people are trying to carry materials through it.
Divide responsibilities according to interest. One player may manage food, another construction, while others handle exploration, defense, or advanced crafting.
Keep Valuable Items in a Protected Core
Rare equipment, advanced materials, mission objects, and irreplaceable resources should not remain beside the front entrance.
Create a protected internal storage room surrounded by stronger materials. Limit unnecessary doors and keep backup equipment inside.
In multiplayer environments with theft or competitive raids, consider dividing valuable resources between several hidden locations. Losing one room should not remove everything required for recovery.
Do not make the secure area so inconvenient that important materials are never returned after use. Security must remain practical.
Prepare Recovery Equipment
Failure is part of survival games. A strong base helps players recover quickly after losing equipment, vehicles, or inventory.
Keep a recovery kit containing basic armor, tools, food, medicine, light sources, and transportation supplies. It should be affordable enough to replace but capable of reaching the lost equipment.
Store several kits when playing with friends. A group recovery attempt becomes complicated when everyone is sharing one damaged tool and half a meal.
Update recovery equipment as progression advances. Early tools may no longer be sufficient for dangerous late-game regions.
Do Not Decorate Before the Base Functions
Decoration makes a settlement feel personal, but it should follow basic functionality. Finish the roof, storage, defenses, food supply, and transportation access before spending rare materials on visual details.
This does not mean the base must remain ugly. Simple lighting, consistent materials, and clear room layouts can improve appearance without interrupting progression.
Decorate gradually as new sections become stable. Functional objects can also become part of the design when arranged carefully.
A beautiful base is more enjoyable when players are not running through it in the rain searching for the only container that holds medicine.
Leave Room for Expansion
Future crafting stations, vehicles, power systems, and storage requirements are difficult to predict during the early game. Leave empty areas beside important zones.
Use corridors, courtyards, or modular rooms that can connect to new construction. Avoid placing permanent walls around every section too early.
Vertical expansion can save ground space, but confirm that the structural system supports additional floors. Underground expansion may work well for storage and utilities when digging is available.
Modular design is usually more adaptable than one enormous room. New sections can be added without reorganizing the entire settlement.
Test the Base Before a Real Emergency
Walk through common tasks and identify unnecessary movement. Can you return from an expedition, unload resources, repair equipment, prepare food, and rest without crossing the base repeatedly?
Test entrances with vehicles, check defensive sightlines, inspect lighting at night, and verify that emergency exits work.
Temporarily switch off power or imagine that the outer gate has failed. Determine which systems remain accessible.
Small inconveniences become major problems during an attack. Testing reveals them while the base is still calm enough to make improvements.
Common Base-Building Mistakes
- Choosing appearance over resource access;
- Building the permanent base too early;
- Creating a structure much larger than necessary;
- Using too many entrances;
- Ignoring roof and foundation protection;
- Placing storage far from crafting stations;
- Depending on one food or water source;
- Keeping every valuable item in one exposed room;
- Expanding without improving defenses;
- Forgetting to build an emergency exit;
- Leaving no room for future stations or vehicles;
- Decorating before essential systems are complete;
Most weak bases do not fail because one wall lacked enough strength. They fail because several small planning problems appear at the same time.
A Simple Early-Game Base Plan
During the early game, focus on survival rather than architectural ambition. Build a compact structure that supports immediate needs.
- Select a location near food, water, and basic materials;
- Build a secure sleeping or saving area;
- Add basic crafting and cooking stations;
- Create labeled storage categories;
- Light the interior and immediate perimeter;
- Establish one controlled entrance;
- Begin renewable food and water production;
- Reserve space for expansion;
This structure should remain affordable and easy to repair. Once nearby resources and threats are understood, it can be upgraded or replaced.
A Mid-Game Base Upgrade Plan
The middle stage introduces more equipment, valuable resources, transportation, and stronger threats. The base must evolve from a shelter into an organized production center.
- Upgrade foundations and entrances;
- Build separate crafting and storage zones;
- Create farms and renewable resource systems;
- Add layered perimeter defenses;
- Establish power generation and backup capacity;
- Create vehicle access or transportation links;
- Prepare recovery equipment;
- Build one or more regional outposts;
Mid-game construction should focus on efficiency. Every new system needs a logical place and a dependable supply of materials.
A Late-Game Base Plan
Late-game bases support advanced production, large reserves, difficult expeditions, and major attacks. Convenience becomes as important as basic survival.
Automate repetitive tasks when possible. Improve transportation between zones and create specialized storage for rare materials.
Replace vulnerable structural sections and ensure that critical systems have backups. Separate industrial equipment from living and storage areas.
Late-game expansion should improve performance rather than simply increase size. An enormous base is not successful when reaching the correct crafting station requires a packed lunch.
How Large Should a Survival Base Be?
The correct size depends on the number of players, available crafting systems, and construction costs. A solo player usually benefits from a compact layout, while multiplayer groups require wider corridors, more storage, and additional sleeping areas.
Build enough space for current systems plus a reasonable expansion margin. Empty halls provide little value and increase maintenance, lighting, and defensive requirements.
When the base becomes difficult to navigate, divide it into zones or separate buildings connected by protected paths.
What Is the Best Location for a Survival Base?
The strongest general location is a defensible area near renewable food, water, common building materials, and reliable transportation routes.
Central map positions reduce average travel time, but they may also attract more threats. Remote locations provide security at the cost of longer expeditions.
There is rarely one perfect location. Choose according to your current progression and the systems that consume the most time.
Should You Build One Base or Several?
A main base combined with several small outposts is usually more efficient than either one isolated settlement or several equally complex bases.
The central base should contain advanced crafting, major storage, farming, power, and high-value equipment. Outposts should support local resources, travel, and emergency recovery.
This approach reduces repetitive construction while keeping distant areas accessible.
How to Make a Base Easy to Navigate
Use consistent room layouts, signs, lighting, colors, and landmarks. Place related stations together and avoid filling corridors with temporary containers.
Create one obvious central path connecting the entrance, storage, crafting, food, and sleeping areas. Secondary routes can lead toward farms, workshops, and defenses.
In larger structures, maps or directional signs prevent confusion. This is especially useful in multiplayer worlds where not every player participated in construction.
What Makes a Survival Base Successful?
A successful base reduces the time and risk associated with ordinary survival tasks. Food, water, tools, storage, and transportation should be dependable rather than constant emergencies.
The structure should protect important systems, support recovery after failure, and remain adaptable as new mechanics appear. It must also be organized enough that resources can be found quickly.
The best base is not necessarily the largest or most visually impressive. It is the one that makes exploration easier, preparation faster, and dangerous situations more manageable.
Final Base-Building Checklist
- Choose a location with useful nearby resources;
- Observe environmental and enemy activity;
- Begin with a compact functional shelter;
- Create organized storage categories;
- Establish renewable food and water;
- Use layered defenses and limited entrances;
- Protect the roof, foundation, and weak corners;
- Keep emergency supplies near the exit;
- Prepare backup equipment and power;
- Build transportation links and regional outposts;
- Leave room for future expansion;
- Test the layout before a major attack;
Building a Better Survival Game Base
A strong base begins with practical decisions. Location matters more than decorative shape, organization matters more than total size, and reliable resources matter more than a room filled with objects collected for no particular reason.
Start small and solve immediate needs. Add renewable food, water, storage, crafting, and defenses as the game introduces greater pressure. Upgrade important sections before rebuilding everything, and create outposts when travel becomes inefficient.
Most importantly, design the base around the actions you perform repeatedly. Returning from an expedition should lead naturally through unloading, repairing, crafting, eating, and preparing for the next journey.
When every system has a purpose and every important item has a predictable location, the base stops being a shelter. It becomes the engine behind the entire survival experience—and the first place you will confidently run toward when the forest suddenly starts making unfamiliar noises.