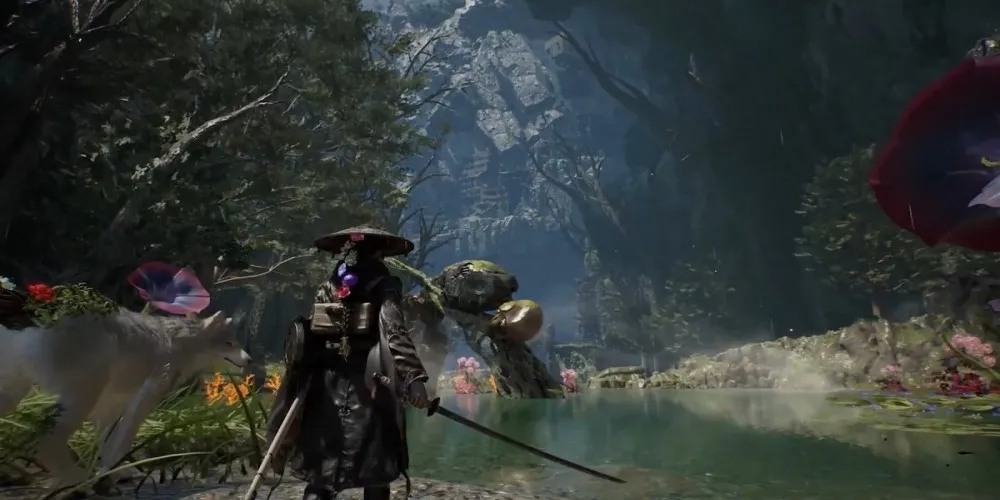
Beast of Reincarnation gives players considerable freedom when developing Emma and Koo. Both characters have their own skill trees, several specialized branches, unique combat techniques, and upgrades that can completely change how the pair approaches difficult encounters.
There is no single build that will work perfectly for every player. Someone who enjoys ranged attacks may invest heavily in Emma’s Tracking Shot branch, while a player who prefers aggressive Blade Art combinations may focus on Entanglement Overdrive. Koo can be developed as a status-effect specialist, defensive companion, healer, distraction, or exploration partner.
Even with that flexibility, some skills are more valuable than others during the opening chapters. Unlocking the right abilities early can improve damage, survivability, resource generation, and access to enemy weaknesses without wasting expensive Skill Points on upgrades that do not support your preferred style.
This guide explains how the skill trees work, which Nushi Skills should be prioritized, and which upgrades provide the strongest foundations for Emma and Koo.
How Skills Work in Beast of Reincarnation
Emma and Koo have separate skill trees. Each tree contains three major roots, additional branches, passive improvements, combat abilities, and Nushi-related techniques.
Emma’s Nushi abilities are known as Blade Arts, while Koo uses Bloom Arts. These attacks provide different damage types and effects, making them essential when facing opponents with specific weaknesses.
More advanced skills require investment in character attributes. Emma and Koo may need higher Strength, Vigor, or Fluorescence before later sections of a branch become available.
Main Types of Skills
- Nushi Skills that unlock Blade Arts and Bloom Arts;
- Active combat techniques;
- Passive statistical improvements;
- Mods applied to Koo’s Bloom Arts;
- Healing and defensive abilities;
- Exploration and assassination upgrades;
- Entanglement Gauge improvements;
Skill Point costs increase as the tree develops, so planning becomes more important during the later chapters. Early experimentation is useful, but expensive upgrades should support abilities you regularly use.
Unlock New Nushi Skills Whenever They Become Available
Nushi Skills should be among your highest priorities for both characters. They unlock new Blade Arts and Bloom Arts, expanding the damage types and status effects available in combat.
Emma’s first Nushi branch includes Blade Art: Shakuyaku, which deals Physical damage. Its later upgrades can improve properties such as speed and range.
Additional branches introduce other elements. Emma’s Sakura techniques deal Lightning damage, while Dokuzeri abilities focus on Poison buildup and damage over time.
Koo begins with the Higanbana branch, which provides Flame-based Bloom Arts. Later options give him access to more effects and allow the pair to adjust their loadout according to the next opponent.
Why Damage Variety Matters
- Different opponents have different elemental weaknesses;
- Status effects can continue applying pressure after an attack;
- Some bosses resist one damage type but remain vulnerable to another;
- Multiple Nushi branches make build adjustments easier;
- Blade Arts and Bloom Arts can be combined into stronger combat cycles;
You do not need to fully upgrade every Nushi ability immediately. Unlock the main Arts first, test them during combat, and improve the techniques that feel comfortable and reliable.
Do Not Build Only Around Enemy Weaknesses
Matching an enemy’s weakness can make an encounter easier, but it is not the only way to create an effective build. Weapons and Tools can provide additional damage types when Emma’s preferred Blade Arts do not match the target perfectly.
A familiar skill combination that can be performed consistently may be more valuable than an unfamiliar ability selected only because its element looks optimal.
Use weaknesses as an advantage rather than a strict requirement. Keep several Nushi Arts available, but continue upgrading the combinations that best fit your timing and movement habits.
Emma’s Skill Tree Explained
Emma’s tree is divided into Tracking Shot, Hair, and Entanglement Overdrive roots. Each branch supports a different approach to combat.
Tracking Shot
Tracking Shot primarily improves ranged attacks. It also includes mobility options and later abilities that allow Koo to help Emma perform assassinations.
Players who frequently use the Bow or Crossbow will receive the greatest benefit from continued investment in this root.
Hair
The Hair root strengthens Emma’s hair-based attacks, aerial movement, and certain stealth mechanics. These skills can improve direct damage while creating safer positions above opponents.
Later upgrades support players who enjoy approaching enemies quietly and using the environment to remain concealed.
Entanglement Overdrive
Entanglement Overdrive improves the Entanglement Gauge, its recovery speed, and the benefits associated with using it. This root supports frequent Blade Arts and longer periods of slowed time.
It is one of the strongest general-purpose branches because it reinforces mechanics useful to almost every build.
Best Overall Emma Branch: Entanglement Overdrive
Entanglement Overdrive is the most dependable branch for players who regularly use Blade Arts. Its opening skills increase the total size of the Entanglement Gauge, improve recovery, and strengthen healing items.
A larger gauge allows Emma to perform more Blade Arts before the resource is exhausted. It also extends opportunities to slow time and perform several attacks against agile opponents.
This becomes especially useful during boss encounters where short openings must be converted into as much damage and status buildup as possible.
Best Entanglement Overdrive Skills
- Expand Entanglement Gauge;
- Entanglement Gauge Recovery;
- Recovery Effect Boost;
- Extend Blade Effects;
- Critical Boost;
Expand Entanglement Gauge and Entanglement Gauge Recovery should be prioritized early. Together, they increase both the amount of resource available and how quickly it returns.
Extend Blade Effects and Critical Boost become increasingly useful as Emma gains stronger Arts and begins facing opponents with larger health reserves.
Why the Entanglement Gauge Is So Important
The Entanglement Gauge supports some of Emma’s strongest actions. It allows her to use Blade Arts and access time-slowing mechanics that create longer offensive opportunities.
Without sufficient gauge capacity, a player may complete one strong sequence and then wait too long before repeating it. Improving capacity and recovery creates a more consistent combat rhythm.
The gauge becomes particularly valuable against fast opponents. Slowed time gives players additional moments to aim, reposition, choose an ability, or continue an attack before the target escapes.
Best Early Tracking Shot Skills
Even players who do not intend to create a dedicated ranged build should invest several points in the beginning of Tracking Shot.
The branch contains useful general abilities that support Entanglement recovery, mobility, and Koo’s involvement in combat.
Entangled Follow Up
Entangled Follow Up improves Entanglement Gauge recovery when Koo performs follow-up attacks. This creates a direct connection between Koo’s actions and Emma’s Blade Art resource.
The skill is valuable for almost every build because Koo should be used regularly during difficult encounters.
Attack Dog
Attack Dog expands Koo’s offensive role and supports builds where Emma creates an opening for her companion to continue applying pressure.
It is particularly useful when combined with other abilities that reward follow-up attacks or generate additional Entanglement.
Lucky Shot
Lucky Shot improves the value of ranged combat and is worth considering for players who frequently use the Bow or Crossbow.
It may be less important for a purely melee-focused build, but it creates a useful foundation before more advanced ranged upgrades become available.
Roll
The Roll skill provides an additional evasive option. Mobility remains valuable regardless of weapon or damage type, making this one of the most practical Tracking Shot investments.
It can help Emma reposition, avoid pressure, and create space for a ranged attack or Koo command.
Should You Continue Investing in Tracking Shot?
Continue developing Tracking Shot when ranged combat is an important part of your regular strategy. Later skills enhance Bow and Crossbow performance and introduce stronger assassination-related options.
Koo can eventually help remove unaware enemies, and certain upgrades restore Emma’s health after successful assassinations.
Players who rarely use ranged attacks can stop after collecting the most useful early skills. Those Skill Points may provide greater value in Entanglement Overdrive or favorite Nushi abilities.
Best Early Hair Skills
Emma’s Hair branch contains two especially useful early upgrades: Sprout Shakuyaku and Helm Splitter.
Sprout Shakuyaku
Sprout Shakuyaku improves Emma’s hair-related combat options and creates a foundation for further investment in the branch.
It supports players who frequently use hair movement as part of their normal attack combinations rather than treating it only as an exploration tool.
Helm Splitter
Helm Splitter allows Emma to gain height with her hair before descending onto opponents with an area attack.
The ability can damage multiple targets, contribute to stun buildup, and move Emma above certain ground-level attacks. It therefore serves as both an offensive technique and an evasive option.
Helm Splitter is worth upgrading even when the rest of the Hair branch is not a major priority.
When to Stop Investing in Hair Skills
After maximizing Helm Splitter, many players can temporarily move their attention to Entanglement Overdrive and Nushi upgrades.
Hair remains useful, but its later benefits are more specialized. Continued investment makes the most sense for players who enjoy stealth, aerial attacks, and hair-based movement.
Other builds can return to the branch after their core damage and resource skills have been completed.
Best Hair Skill for Stealth Builds
Cloaking Grass is one of the most notable later Hair abilities. It allows Emma to conceal herself using purple grass and approach enemies more effectively.
This skill is valuable for players who prefer assassinations and controlled engagements rather than direct confrontations with entire groups.
It works especially well when combined with Tracking Shot abilities that improve Koo’s assassination role.
Best Emma Skills to Prioritize
Tracking Shot Priorities
- Entangled Follow Up;
- Attack Dog;
- Lucky Shot;
- Roll;
Hair Priorities
- Sprout Shakuyaku;
- Helm Splitter;
- Cloaking Grass for stealth-focused builds;
Entanglement Overdrive Priorities
- Expand Entanglement Gauge;
- Entanglement Gauge Recovery;
- Extend Blade Effects;
- Critical Boost;
- Recovery Effect Boost;
Nushi Skill Priorities
- Unlock every new Blade Art when it becomes available;
- Improve the speed and range of frequently used Arts;
- Maintain access to several damage types;
- Upgrade combinations that can be performed consistently;
Best Nushi Skills for Emma
Every Nushi branch provides value because it expands Emma’s available damage types. However, players should focus expensive upgrades on Arts they genuinely enjoy.
Kiku
Kiku provides reliable Physical damage and works well for players who want straightforward pressure without relying entirely on elemental buildup.
It is useful when an opponent lacks a clear weakness or when Emma’s weapon and Tools already cover the necessary elemental effects.
Dokuzeri
Dokuzeri focuses on Poison damage. Once enough Poison has been accumulated, the effect continues reducing the target’s health over time.
This can be effective against bosses with long encounters because the status continues working while Emma is dodging, healing, or repositioning.
Dokuzeri pairs particularly well with Koo’s Flame-based Higanbana Arts, giving the pair access to multiple sources of ongoing pressure.
Sakura
Sakura introduces Lightning damage and gives Emma another option for exploiting elemental vulnerabilities.
Unlock the branch when it becomes available even when it is not part of your main build. Access to Lightning can become useful against a later opponent or specific enemy group.
Koo’s Skill Tree Explained
Koo’s skill tree contains Incantation, Guard, and Pounce roots. These branches determine how he applies status effects, protects Emma, restores resources, controls enemy attention, and assists during exploration.
Incantation
Incantation unlocks Mods that can be attached to Bloom Arts. These Mods improve status buildup, increase damage, and provide bonuses when attacking affected opponents.
This is the strongest general combat branch for Koo.
Guard
Guard focuses on defense and support. It contains Mods that restore the Entanglement Gauge, activate Emma’s weapon effects, cleanse status buildup, and recover health.
Several early Guard skills are useful even when the branch is not your primary focus.
Pounce
Pounce improves Koo’s direct combat actions and exploration utility. It contains traps, Taunt, healing abilities, assassination support, and skills that help locate or collect hidden items.
The branch is ideal for players who want Koo to remain highly active throughout both combat and exploration.
Best Overall Koo Branch: Incantation
Incantation provides some of Koo’s strongest combat upgrades because status effects are valuable against many bosses and powerful enemies.
Mods can increase the speed at which a condition is applied or provide additional bonuses when Emma and Koo attack an affected target.
These bonuses may improve attack, Vigor, Fortitude, or another useful property depending on the selected Mod.
Mod: Status Effect Amp
Status Effect Amp increases status buildup from Koo’s Bloom Arts. This allows Poison, Flame, and other conditions to activate more quickly.
It is one of the best early Mods for a build centered on exploiting elemental vulnerabilities.
Mod: Last Stand
Last Stand improves combat performance under its required conditions and can create valuable additional pressure during difficult encounters.
It becomes more effective when attached to a Bloom Art that already fits the current enemy’s weakness or your preferred status build.
Mod: Full Bloom Crit
Full Bloom Crit is a powerful later upgrade. When Koo has a full FP bar, his hits are treated as critical attacks.
This can dramatically increase his damage, particularly when used with a multi-hit Bloom Art capable of connecting several times.
Because it appears later and requires a considerable investment, players should develop core status and support abilities before saving for it.
Change Incantation Mods According to Your Build
Koo’s Mods should not remain unchanged for the entire game. Different combinations become stronger depending on the Bloom Arts being used and the status effects currently applied.
Mod: Poison Expert is an obvious choice when Emma and Koo are building Poison. Mod: Magmatic Mantle is more appropriate for a Flame-focused strategy.
Review equipped Mods before major encounters. A small adjustment may provide more value than purchasing another general passive skill.
Best Early Guard Skills
Guard may not be the first branch to complete, but it contains several abilities that should be obtained relatively early.
Mod: Resonance
Resonance helps restore the Entanglement Gauge when Koo uses the associated Bloom Art.
This supports Emma’s Entanglement Overdrive build and allows her to perform Blade Arts more frequently.
It becomes particularly effective when Koo is already using Bloom Arts regularly as part of the normal combat rotation.
Mod: Battleborn
Battleborn allows Emma to activate the special effect of her equipped weapon. This is one of the most important Koo Mods because it opens another layer of build customization.
Weapons with useful special abilities become significantly more valuable after Battleborn is unlocked.
Players should save enough points to obtain this Mod even when focusing primarily on Incantation or Pounce.
Mod: Healing Energy
Healing Energy cleanses status-effect buildup from Emma when Koo uses a Bloom Art equipped with the Mod.
This can prevent Poison or another dangerous condition from fully activating and reduces dependence on consumable items.
It provides excellent value in areas filled with environmental status hazards or opponents that repeatedly apply the same condition.
Best Pounce Skills
Pounce expands Koo’s direct actions and includes several abilities that improve Emma’s survivability.
Lay Landmine
Lay Landmine allows Koo to place a trap in an enemy’s path. It is useful for controlling narrow routes or preparing damage before a group becomes fully aware of Emma.
Traps work best when enemy movement can be predicted rather than when they are placed randomly during a chaotic encounter.
Lay Flame Trap
Lay Flame Trap provides another area-control option and supports Flame-focused builds.
It can contribute to status buildup before Emma begins her main attack sequence.
Taunt
Taunt allows Koo to attract enemy attention. This gives Emma time to attack from a safer position, heal, prepare a Blade Art, or use a ranged weapon.
The skill is especially valuable during encounters with several opponents or a boss that applies continuous pressure.
Healing Bouquet
Healing Bouquet restores health and improves the pair’s ability to remain active during longer battles.
It reduces pressure on Emma’s recovery items and can support more aggressive play when the timing is used carefully.
Healing Garden
Healing Garden provides another source of recovery and is valuable for builds that prioritize endurance.
It works particularly well during encounters where Emma can remain within a controlled area for several moments.
Snatch
Snatch improves Koo’s ability to obtain items. It is useful for exploration and can reward players who regularly pay attention to his detection signals.
While it does not increase direct combat power, greater access to materials can support equipment development and consumable preparation.
Best Late-Game Pounce Skills
Internal Respiration and Photosynthesis become available later and improve Koo’s resource recovery.
These skills help restore his HP and FP, allowing him to continue using Bloom Arts and support abilities during extended encounters.
They are powerful but costly. Most players should first obtain essential Incantation Mods, Battleborn, Healing Energy, and useful early Pounce abilities.
Best Skills to Prioritize for Koo
Incantation Priorities
- Mod: Status Effect Amp;
- Mod: Last Stand;
- Mod: Full Bloom Crit;
- Element-specific Mods that match equipped Bloom Arts;
Guard Priorities
- Mod: Resonance;
- Mod: Battleborn;
- Mod: Healing Energy;
Pounce Priorities
- Taunt;
- Healing Bouquet;
- Healing Garden;
- Snatch;
- Lay Landmine;
- Lay Flame Trap;
Late-Game Priorities
- Internal Respiration;
- Photosynthesis;
- Mod: Full Bloom Crit;
- Advanced Mods for the status type used most often;
Best Nushi Skills for Koo
As with Emma, Koo should unlock every new Nushi branch when it becomes available. More Bloom Arts create greater flexibility when preparing for bosses and difficult enemy groups.
Higanbana
Higanbana Bloom Arts deal Flame damage and provide excellent opportunities for elemental buildup.
They combine well with Emma’s Dokuzeri Poison techniques, allowing the pair to maintain two different forms of status pressure.
Kiku
Kiku Bloom Arts deal Destructive damage and can push enemies backward. This makes them particularly useful against groups.
The ability to create distance can prevent Emma from becoming surrounded and may interrupt opponents preparing a dangerous attack.
How to Build a Status-Focused Setup
A status build uses Emma and Koo to apply one or more conditions as quickly as possible. Poison and Flame are a strong early combination because they continue creating pressure after the initial attacks.
Recommended Status Build Skills
- Emma’s Dokuzeri Blade Arts;
- Koo’s Higanbana Bloom Arts;
- Mod: Status Effect Amp;
- Mod: Poison Expert when using Poison;
- Mod: Magmatic Mantle when using Flame;
- Expand Entanglement Gauge;
- Entanglement Gauge Recovery;
Begin by commanding Koo to apply Flame buildup, then use Emma’s Blade Arts to add Poison. Once the effects activate, continue attacking while they reduce the opponent’s health.
Switch Mods whenever one status type becomes more important than the other.
How to Build an Entanglement Setup
An Entanglement build focuses on frequent Blade Arts and extended slow-motion opportunities.
Recommended Entanglement Skills
- Expand Entanglement Gauge;
- Entanglement Gauge Recovery;
- Extend Blade Effects;
- Critical Boost;
- Entangled Follow Up;
- Koo’s Mod: Resonance;
Koo’s follow-up attacks and Resonance Mod help restore the gauge, while Emma’s Overdrive upgrades increase its capacity and effectiveness.
This setup is highly flexible because it improves whichever Blade Arts Emma chooses to equip.
How to Build a Ranged Setup
Players who enjoy the Bow and Crossbow should continue developing Tracking Shot after collecting its early universal skills.
Recommended Ranged Skills
- Lucky Shot;
- Roll;
- Entangled Follow Up;
- Later Bow and Crossbow improvements;
- Hair skills that help Emma gain height;
- Koo’s Taunt to redirect enemy attention;
Use Koo to distract opponents while Emma gains distance or height. Aerial aiming can slow time, allowing several accurate ranged attacks before landing.
How to Build a Stealth Setup
A stealth build combines Hair concealment, assassination upgrades, and Koo’s exploration abilities.
Recommended Stealth Skills
- Cloaking Grass;
- Attack Dog;
- Tracking Shot assassination upgrades;
- Snatch;
- Koo’s later assassination improvements;
- Hair movement upgrades;
Use purple grass to conceal Emma, approach from an angle, and allow Koo to support the assassination when the necessary skill has been unlocked.
Stealth may not replace direct combat during every boss encounter, but it can reduce the difficulty of ordinary areas and conserve healing resources.
How to Build a Defensive Setup
Players struggling with survivability should combine Koo’s Guard and Pounce abilities with Emma’s recovery and mobility upgrades.
Recommended Defensive Skills
- Recovery Effect Boost;
- Roll;
- Helm Splitter for aerial repositioning;
- Mod: Healing Energy;
- Taunt;
- Healing Bouquet;
- Healing Garden;
- Mod: Resonance;
Koo can redirect enemy attention while Emma heals or repositions. Healing Energy reduces the danger of status buildup, while stronger recovery items provide more value from limited resources.
Best Skill Order for Emma
- Unlock available Nushi Blade Arts;
- Acquire Entangled Follow Up;
- Unlock Sprout Shakuyaku and Helm Splitter;
- Improve the Entanglement Gauge;
- Increase gauge recovery;
- Unlock Roll;
- Improve the speed and range of favorite Blade Arts;
- Add Critical Boost and Extend Blade Effects;
- Continue into Tracking Shot or Hair according to playstyle;
This order creates a balanced foundation with Blade Art access, aerial movement, resource recovery, and a reliable evasive option.
Best Skill Order for Koo
- Unlock available Nushi Bloom Arts;
- Acquire Status Effect Amp;
- Unlock Taunt or an early trap;
- Save for Mod: Battleborn;
- Acquire Mod: Resonance;
- Unlock Mod: Healing Energy;
- Add Healing Bouquet and Healing Garden;
- Improve element-specific Incantation Mods;
- Save for Full Bloom Crit and late-game recovery skills;
This progression gives Koo a strong mixture of elemental pressure, support, healing, and weapon synergy.
When to Save Skill Points
Not every available ability should be purchased immediately. Some later skills are expensive and may have a greater effect on the build than several small early passives.
Save points when approaching a major attribute requirement or when a valuable Mod such as Battleborn is close to becoming available.
Before buying a minor improvement, compare its effect with the next skill in your preferred branch. Waiting may provide a more noticeable upgrade.
Should You Respec Your Skills?
Respeccing can be useful when a build has been spread too widely or when a late-game ability requires more focused investment.
A player who purchased several Hair, Tracking Shot, and Pounce upgrades without developing any central strategy may benefit from concentrating those points into Entanglement, Incantation, or another chosen root.
Experimentation is still valuable during the opening chapters. Respec only when the current distribution prevents access to an ability that would clearly improve the build.
Common Skill-Building Mistakes
- Ignoring new Nushi Skills;
- Spending every point on small passive bonuses;
- Unlocking expensive abilities that are rarely used;
- Failing to change Koo’s Mods between major encounters;
- Building Emma and Koo as separate fighters;
- Ignoring Entanglement Gauge recovery;
- Skipping Battleborn despite using weapons with strong effects;
- Investing heavily in ranged skills without using the Bow or Crossbow;
- Continuing the Hair branch despite not using stealth or aerial techniques;
- Saving every point and never improving current combat performance;
The strongest builds come from synergy. Every major skill should either strengthen a regular action or support another part of the combat cycle.
Best General-Purpose Emma Build
A versatile Emma build should focus on Entanglement Overdrive while collecting several early Tracking Shot and Hair skills.
- Expand Entanglement Gauge;
- Entanglement Gauge Recovery;
- Extend Blade Effects;
- Critical Boost;
- Entangled Follow Up;
- Roll;
- Helm Splitter;
- Two or more upgraded Nushi Blade Arts;
This setup provides frequent Blade Arts, strong resource recovery, mobility, area damage, and access to multiple elements.
Best General-Purpose Koo Build
A versatile Koo build should prioritize Incantation while collecting the strongest early Guard and Pounce abilities.
- Mod: Status Effect Amp;
- Mod: Resonance;
- Mod: Battleborn;
- Mod: Healing Energy;
- Taunt;
- Healing Bouquet;
- One element-specific status Mod;
- At least two upgraded Bloom Arts;
This configuration allows Koo to improve status buildup, restore Emma’s resources, activate weapon effects, cleanse harmful buildup, and redirect enemy attention.
Best Emma and Koo Skill Synergies
Entanglement Recovery Synergy
- Emma: Entangled Follow Up;
- Emma: Entanglement Gauge Recovery;
- Koo: Mod: Resonance;
Koo’s follow-ups and Bloom Arts help restore the gauge, allowing Emma to return to Blade Arts sooner.
Poison and Flame Synergy
- Emma: Dokuzeri Blade Arts;
- Koo: Higanbana Bloom Arts;
- Koo: Status Effect Amp;
- Koo: Poison Expert or Magmatic Mantle;
The pair applies two different elemental conditions and maintains pressure during evasive phases.
Weapon Effect Synergy
- Koo: Mod: Battleborn;
- Emma: Weapon with a strong special effect;
- Emma: Expanded Entanglement Gauge;
Battleborn activates additional weapon potential while Emma’s gauge improvements support repeated high-value attack sequences.
Survival Synergy
- Koo: Taunt;
- Koo: Healing Bouquet or Healing Garden;
- Koo: Healing Energy;
- Emma: Recovery Effect Boost;
- Emma: Roll or Helm Splitter;
Koo draws attention and provides healing while Emma uses mobility to recover safely.
Final Beast of Reincarnation Skill Checklist
- Unlock every available Nushi Art;
- Test new Blade and Bloom Arts before upgrading them heavily;
- Prioritize Emma’s Entanglement Gauge capacity and recovery;
- Unlock Entangled Follow Up and Roll;
- Acquire Helm Splitter early;
- Use Tracking Shot upgrades only when ranged combat is part of the build;
- Continue Hair upgrades for stealth and aerial-focused playstyles;
- Prioritize Koo’s Status Effect Amp;
- Save enough points for Battleborn and Healing Energy;
- Use Taunt and healing abilities to improve survivability;
- Change Koo’s Mods according to the active status build;
- Save for Full Bloom Crit during the later chapters;
Choosing the Best Skills in Beast of Reincarnation
The best skill choices depend on how you use Emma and Koo together. A build focused only on Emma’s damage ignores many of the resource, status, and support opportunities provided by her companion.
Unlock Nushi Arts whenever they appear so the pair always has access to several damage types. For Emma, Entanglement Overdrive provides the strongest general foundation, while Entangled Follow Up, Roll, and Helm Splitter add valuable recovery, mobility, and area pressure.
For Koo, Incantation offers excellent status-effect support, but Battleborn, Healing Energy, Taunt, and healing skills are too useful to ignore. His Mods should be changed regularly rather than treated as permanent passive upgrades.
Focus expensive investments on the skills you use consistently, but keep enough flexibility to respond to different enemies. With a larger Entanglement Gauge, the right elemental Arts, and a Koo build capable of supporting every stage of combat, even the most intimidating malefacts become much easier to approach—and your Skill Tree starts looking less like a confusing forest and more like a carefully cultivated garden of extremely aggressive flowers.